
Resizing Images in Squarespace

You’ve painstakingly combed through what feels like thousands of images for just those - perfect - few that will change lives for those that visit your website (well, maybe not quite that heavy, but you did put a LOT of time into it).
You have a clear, beautiful vision of exactly how you’ll highlight those perfect pics on your site.
But you can’t get past a HUGE obstacle; no matter what you do, your images expand to the full width of your site and leave no room for that amazing content you still need to add!
Have no fear. There’s a super simple fix.
(Skip below to follow along with the video instead.) ↓
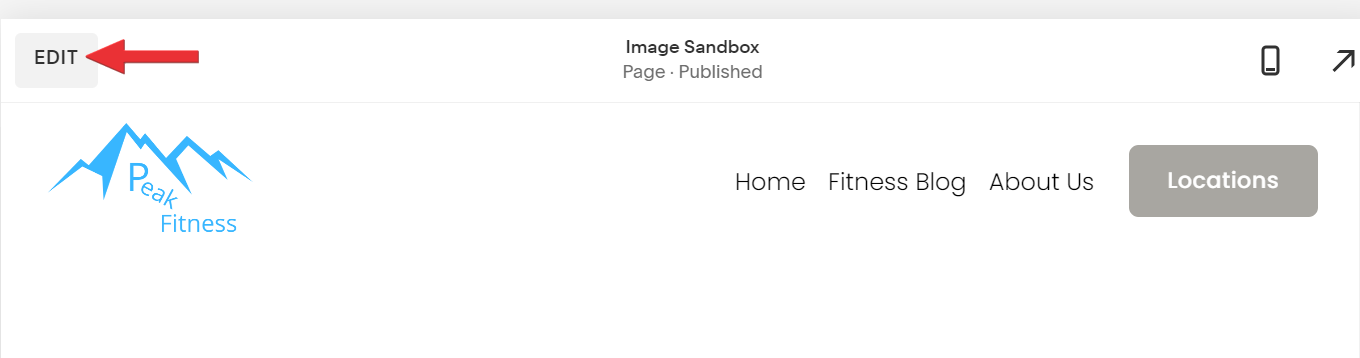
1.) To begin editing, click ‘Edit’ in the top left corner of the page.
2.) Find the teardrop shape symbol, called an
Insertion Point, to add an image.

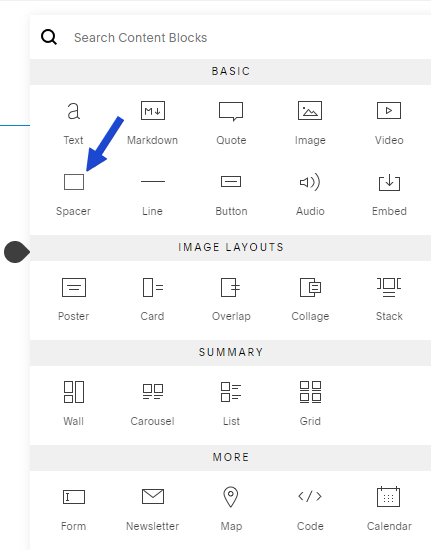
3.) Click on the symbol to find options for elements to add. We’ll be adding an Image Block for our needs.

4.) Click on “Upload an Image” for options to find an image to add using Unsplash as a resource, directly through Squarespace.
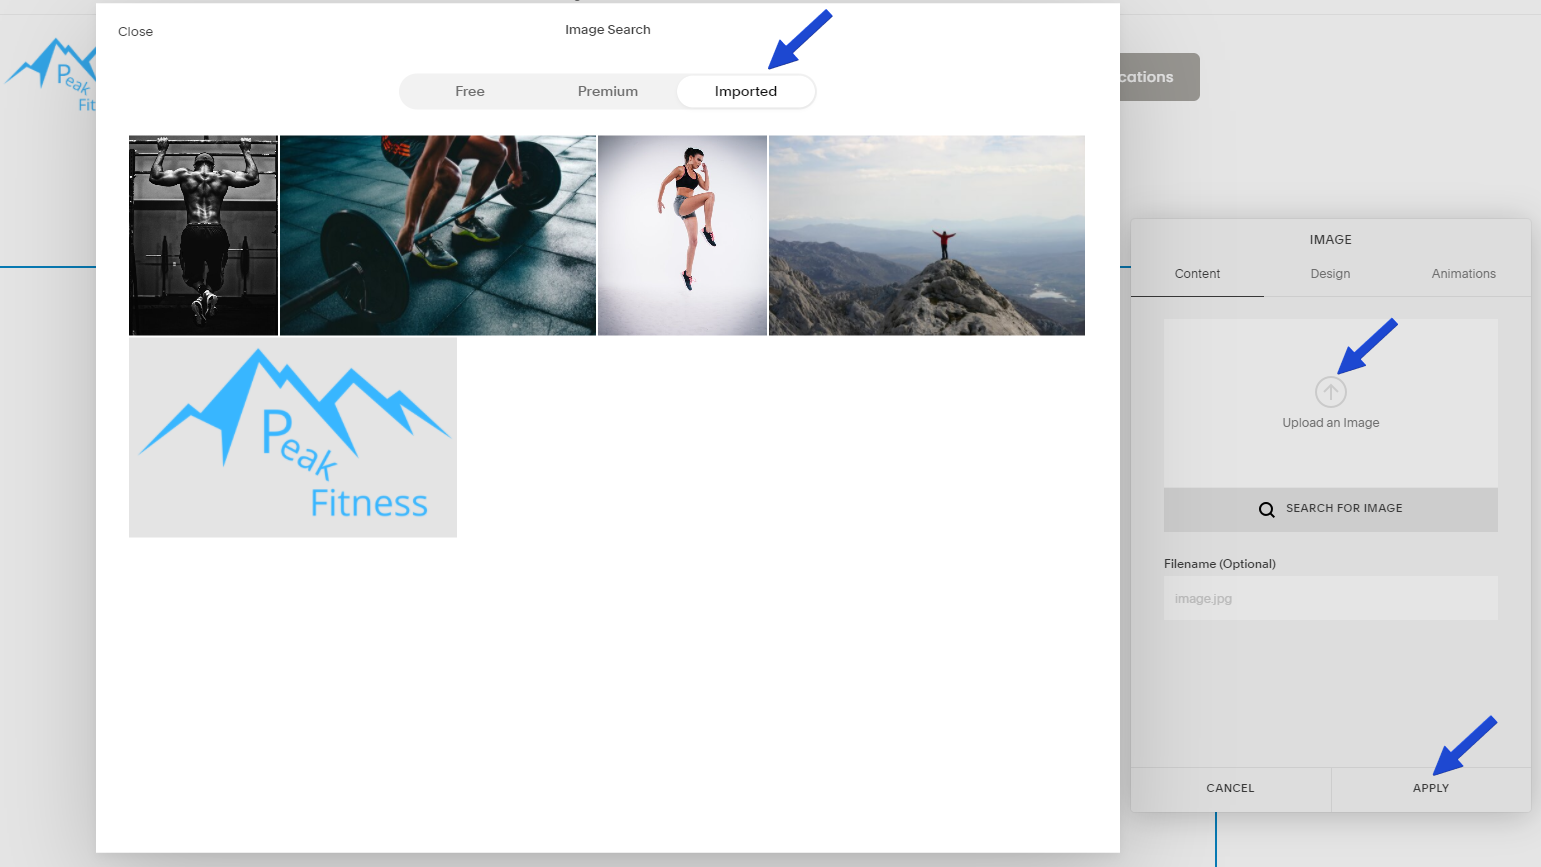
Or select “Search for Image” followed by the ‘Imported’ option at top to bring up a menu of any images already downloaded on the site.
After choosing the image you’d like to use, click ‘Apply’.
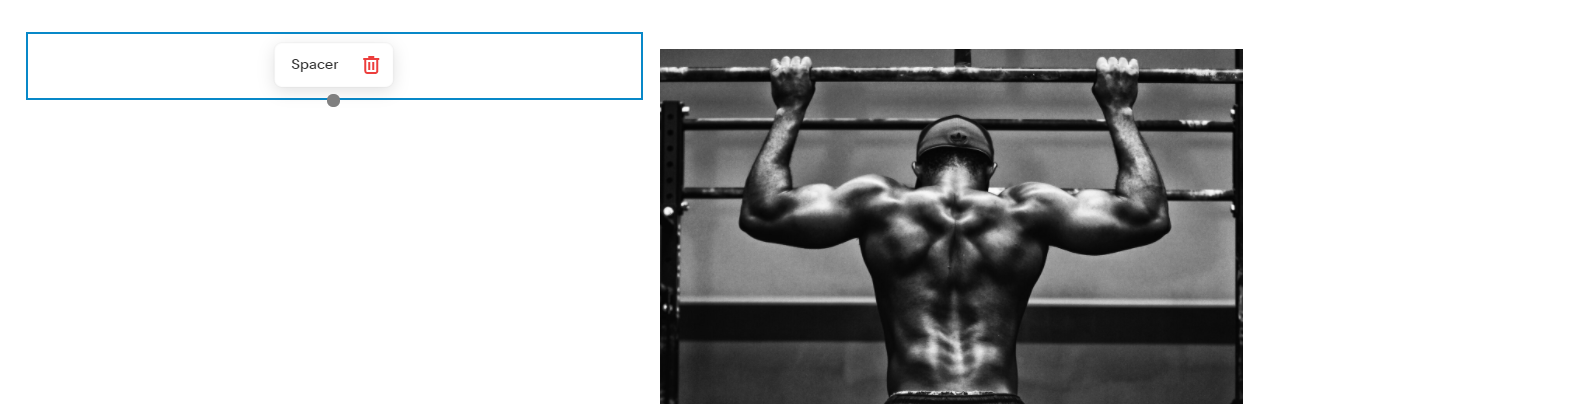
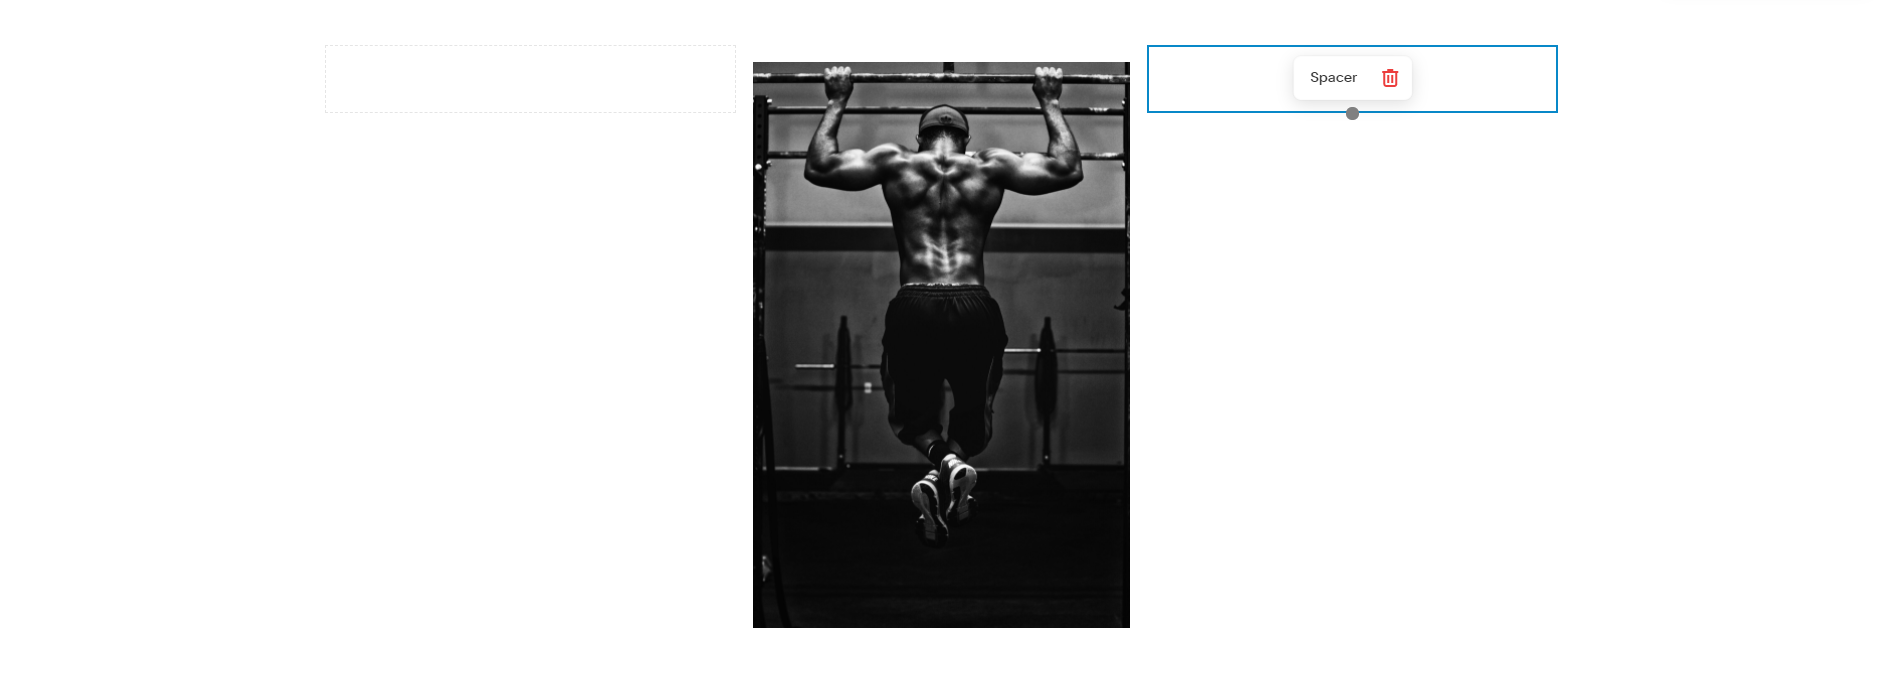
5.) Once your image is in place, click on the teardrop (Insertion Point) once again. This time, select ‘Spacer’ to place a Spacer Block on the page.
6.) From here, the spacer can be drug to either side of the image to left or right align it, or add a second spacer (each placed on either side) to center the image for a more symmetrical look.
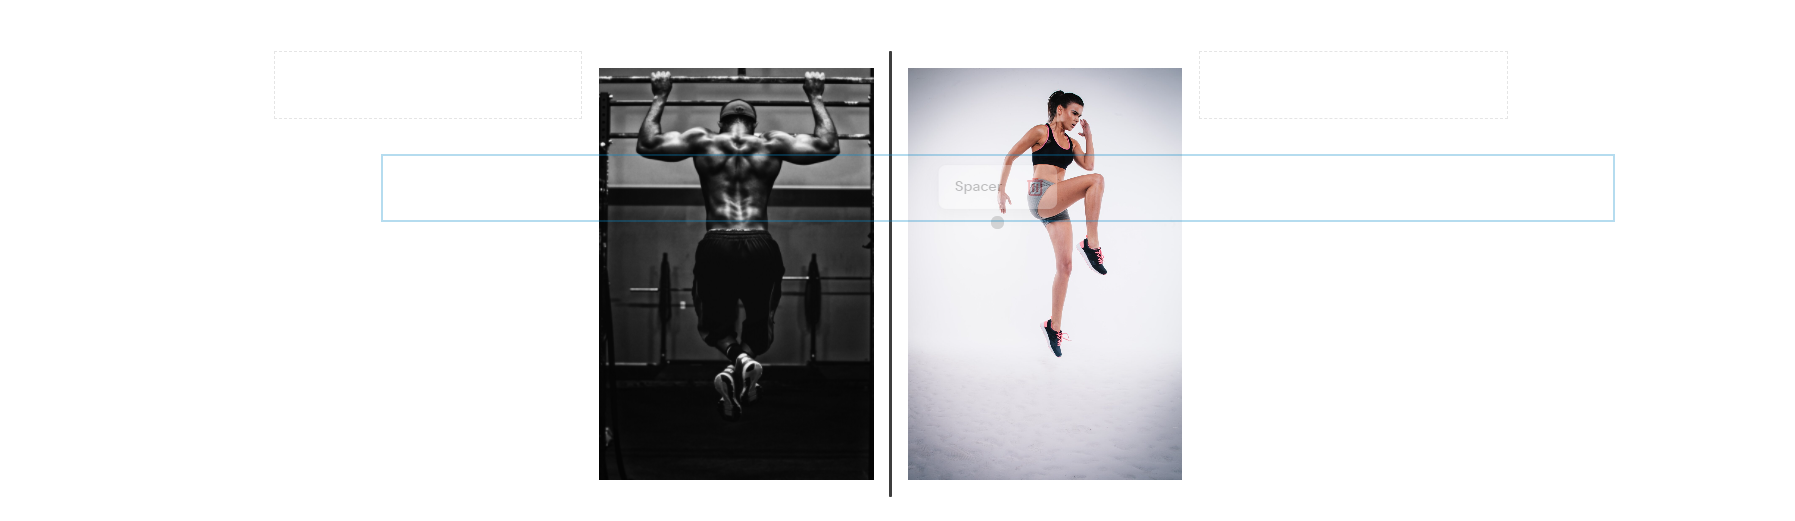
7.) Adding additional images provide the same results as adding spacer blocks. Add additional images (steps 2-4 above) and place them side-by-side to decrease the size of each image. Spacer blocks can also be added between images to increase the padding from one image to the next. Definitely useful in preventing images from looking to crowded or ‘on-top-of-one-another’.

Prefer to watch the video tutorial? Check it out here:

Leave a comment below if you found this tip helpful. I’d love to know how it helped you!